Developing a Bioconductor package with RStudio and Docker
If you’re going to develop a Bioconductor package you’ll soon discover that your package has to work on both the development version and the release version of Bioconductor. This means that your package has to build against two different versions of R. Which means you need two different R versions on your own machine to develop your package. This can be done, but not nicely. So what can we do?
Docker solves this problem for us: Instead of having to install R on your own system, you can use an existing Docker image with the appropriate R version already installed. Bioconductor makes our job even easier, as they have ready-made Docker images for both the development and the release version of Bioconductor. And to top that off, they have Docker images based the RStudio Docker images, which gives us our development environment of choice right in our browser. Let’s take a look at how these images work.
- Run
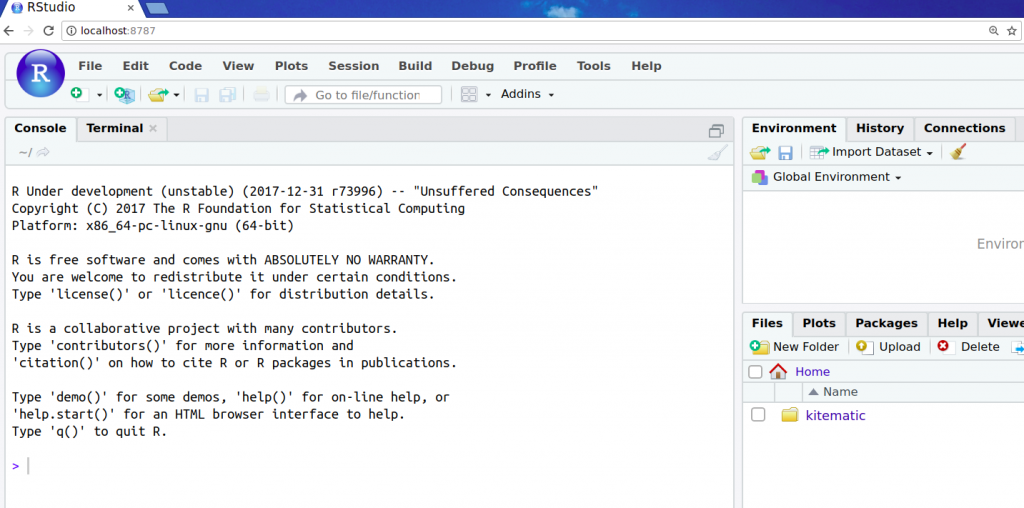
docker run -it -p 8787:8787 bioconductor/devel_core2. This will start a container from the Docker imagebioconductor/devel_core2, and setup the port 8787 on your machine to be routed to port 8787 inside the Docker container. - Open http://localhost:8787/ in your browser. This will open the web frontend for RStudio which is running in the Docker container. You might have to login: The default username/password should be rstudio/rstudio.

As you can see, I’m presented with development version of R. A collection of Bioconductor packages have already been installed in this Docker image for our convenience. That was easy, wasn’t it? Let’s try the release version next:
- This time run
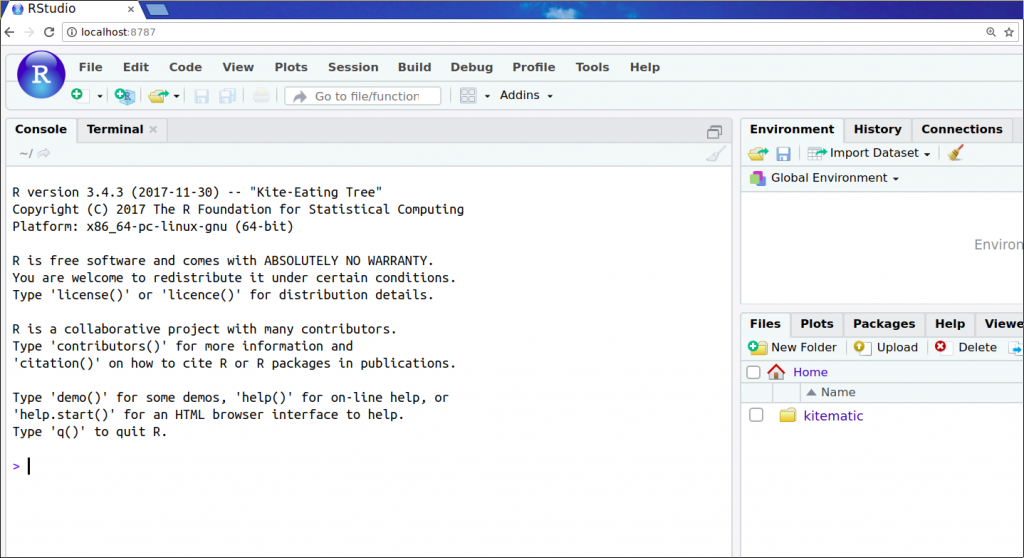
docker run -it -p 8787:8787 bioconductor/release_core2. This will start a container from the Docker imagebioconductor/release_core2, and again setup the port 8787 on your machine to be routed to port 8787 inside the Docker container. - Open http://localhost:8787/ in your browser.

Look at that! Only a few keystrokes, and we have the release version of R with Bioconductor packages ready to go right there in our browser.
This is nice as it is, but what if you want to work on your existing scripts or existing package? Let me show you how I usually work with these Docker images when developing chimeraviz:
- (This first step is optional. Just use your own R code if you have something already.) Clone the chimeraviz repository to somewhere on your computer:
git clone https://github.com/stianlagstad/chimeraviz - Go to the folder where you have your R code. The location of chimeraviz on my system is
/home/stian/dev/chimeraviz, so I’ll go there. - Run
docker run -it -p 8787:8787 -v /home/stian/dev/chimeraviz/:/chimeraviz bioconductor/release_core2. This will start a Docker container from thebioconductor/release_core2image as before, but it will also create a link between the folder/home/stian/dev/chimeravizon my system and the folder/chimeravizinside the Docker container. The result? My code is available inside the container. - Open http://localhost:8787 in your browser.
- Execute
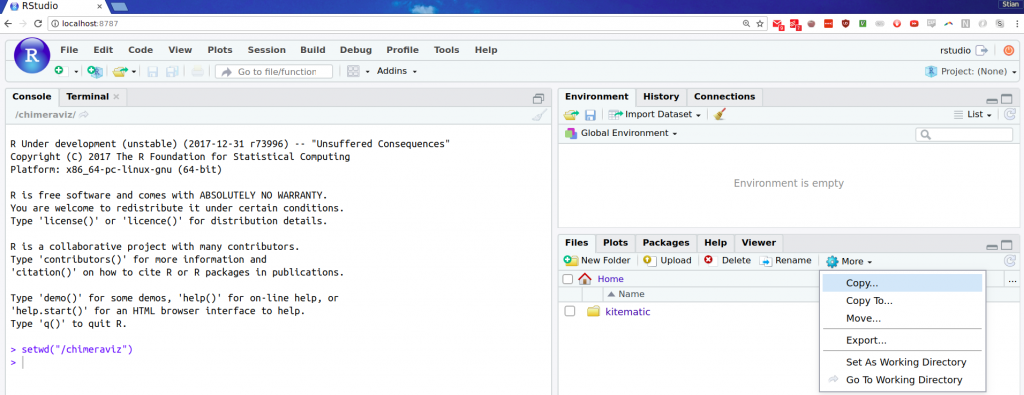
setwd("/chimeraviz")in RStudio. - Down to the right inside RStudio, press “More” and then “Go to working directory”:

With these steps done, you’re ready to start fixing bugs in chimeraviz (of which there are none, surely!). When you’re done, you can execute devtools::check() to make sure everything is still working nicely, and then submit a pull request. :)
This is how I’m currently working when doing changes in chimeraviz. I do changes on the master branch, which has the development version, within the bioconductor/release_core2 Docker image. For the current release version, I check out the RELEASE_3_6 branch, and do changes inside the bioconductor/devel_core2 Docker image. I don’t need R installed on my own system at all. If I’m lazy, I might even skip the devtools::check() step and let Travis check the build for me.
Hope this helps someone! Please do leave a comment if you have any suggestions that can improve the way I work with R.