How to install NixOS on a Dell Precision 5530
After many, many attempts to install NixOS, I finally succeeded. Here are the steps I took to install NixOS on my Dell Precision 5530 laptop.
Let me immediately qualify that by saying that I had no real experience with mkfs, gdisk, cryptsetup, or similar before trying to install NixOS. I had been blissfully ignorant of those kinds of things due to the beginner-friendly nature of the Ubuntu installation process. So when I say “many, many attempts”, please keep in mind that I messed up on the basic tools here and probably would’ve had to use just as many attempts to install Arch Linux.
My goal here was to install NixOS and have the disk encrypted so that I could use it at work. Let’s jump straight into it.
Create a bootable USB drive
- Download the NixOS graphical live CD from here. The version I installed was version 20.03.
- Format your USB drive as a GPT and UEFI drive and load the .iso onto it. I used the Windows program Rufus on my other laptop (you know, the designated Civilization 5 laptop) to do this.
Here’s what the settings in Rufus looked like: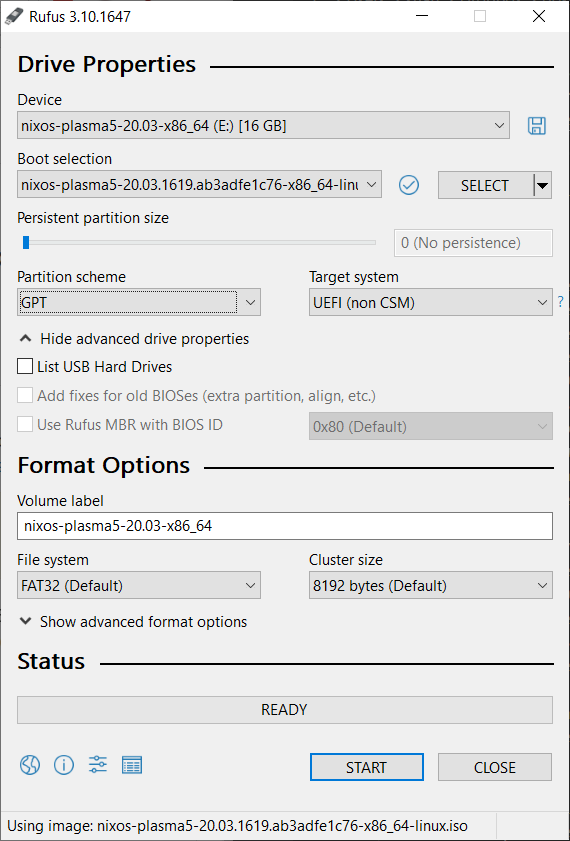
Prepare the Dell laptop
- Boot into BIOS.
- Disable secure boot.
- Make sure that the boot mode is UEFI.
Boot into the NixOS installer
- Insert the USB drive with NixOS into the Dell laptop.
- Start the laptop and hit F12 to open the boot menu.
- Select UEFI BOOT and your USB drive. To me the option said “UEFI: SanDisk, Partition 1”.
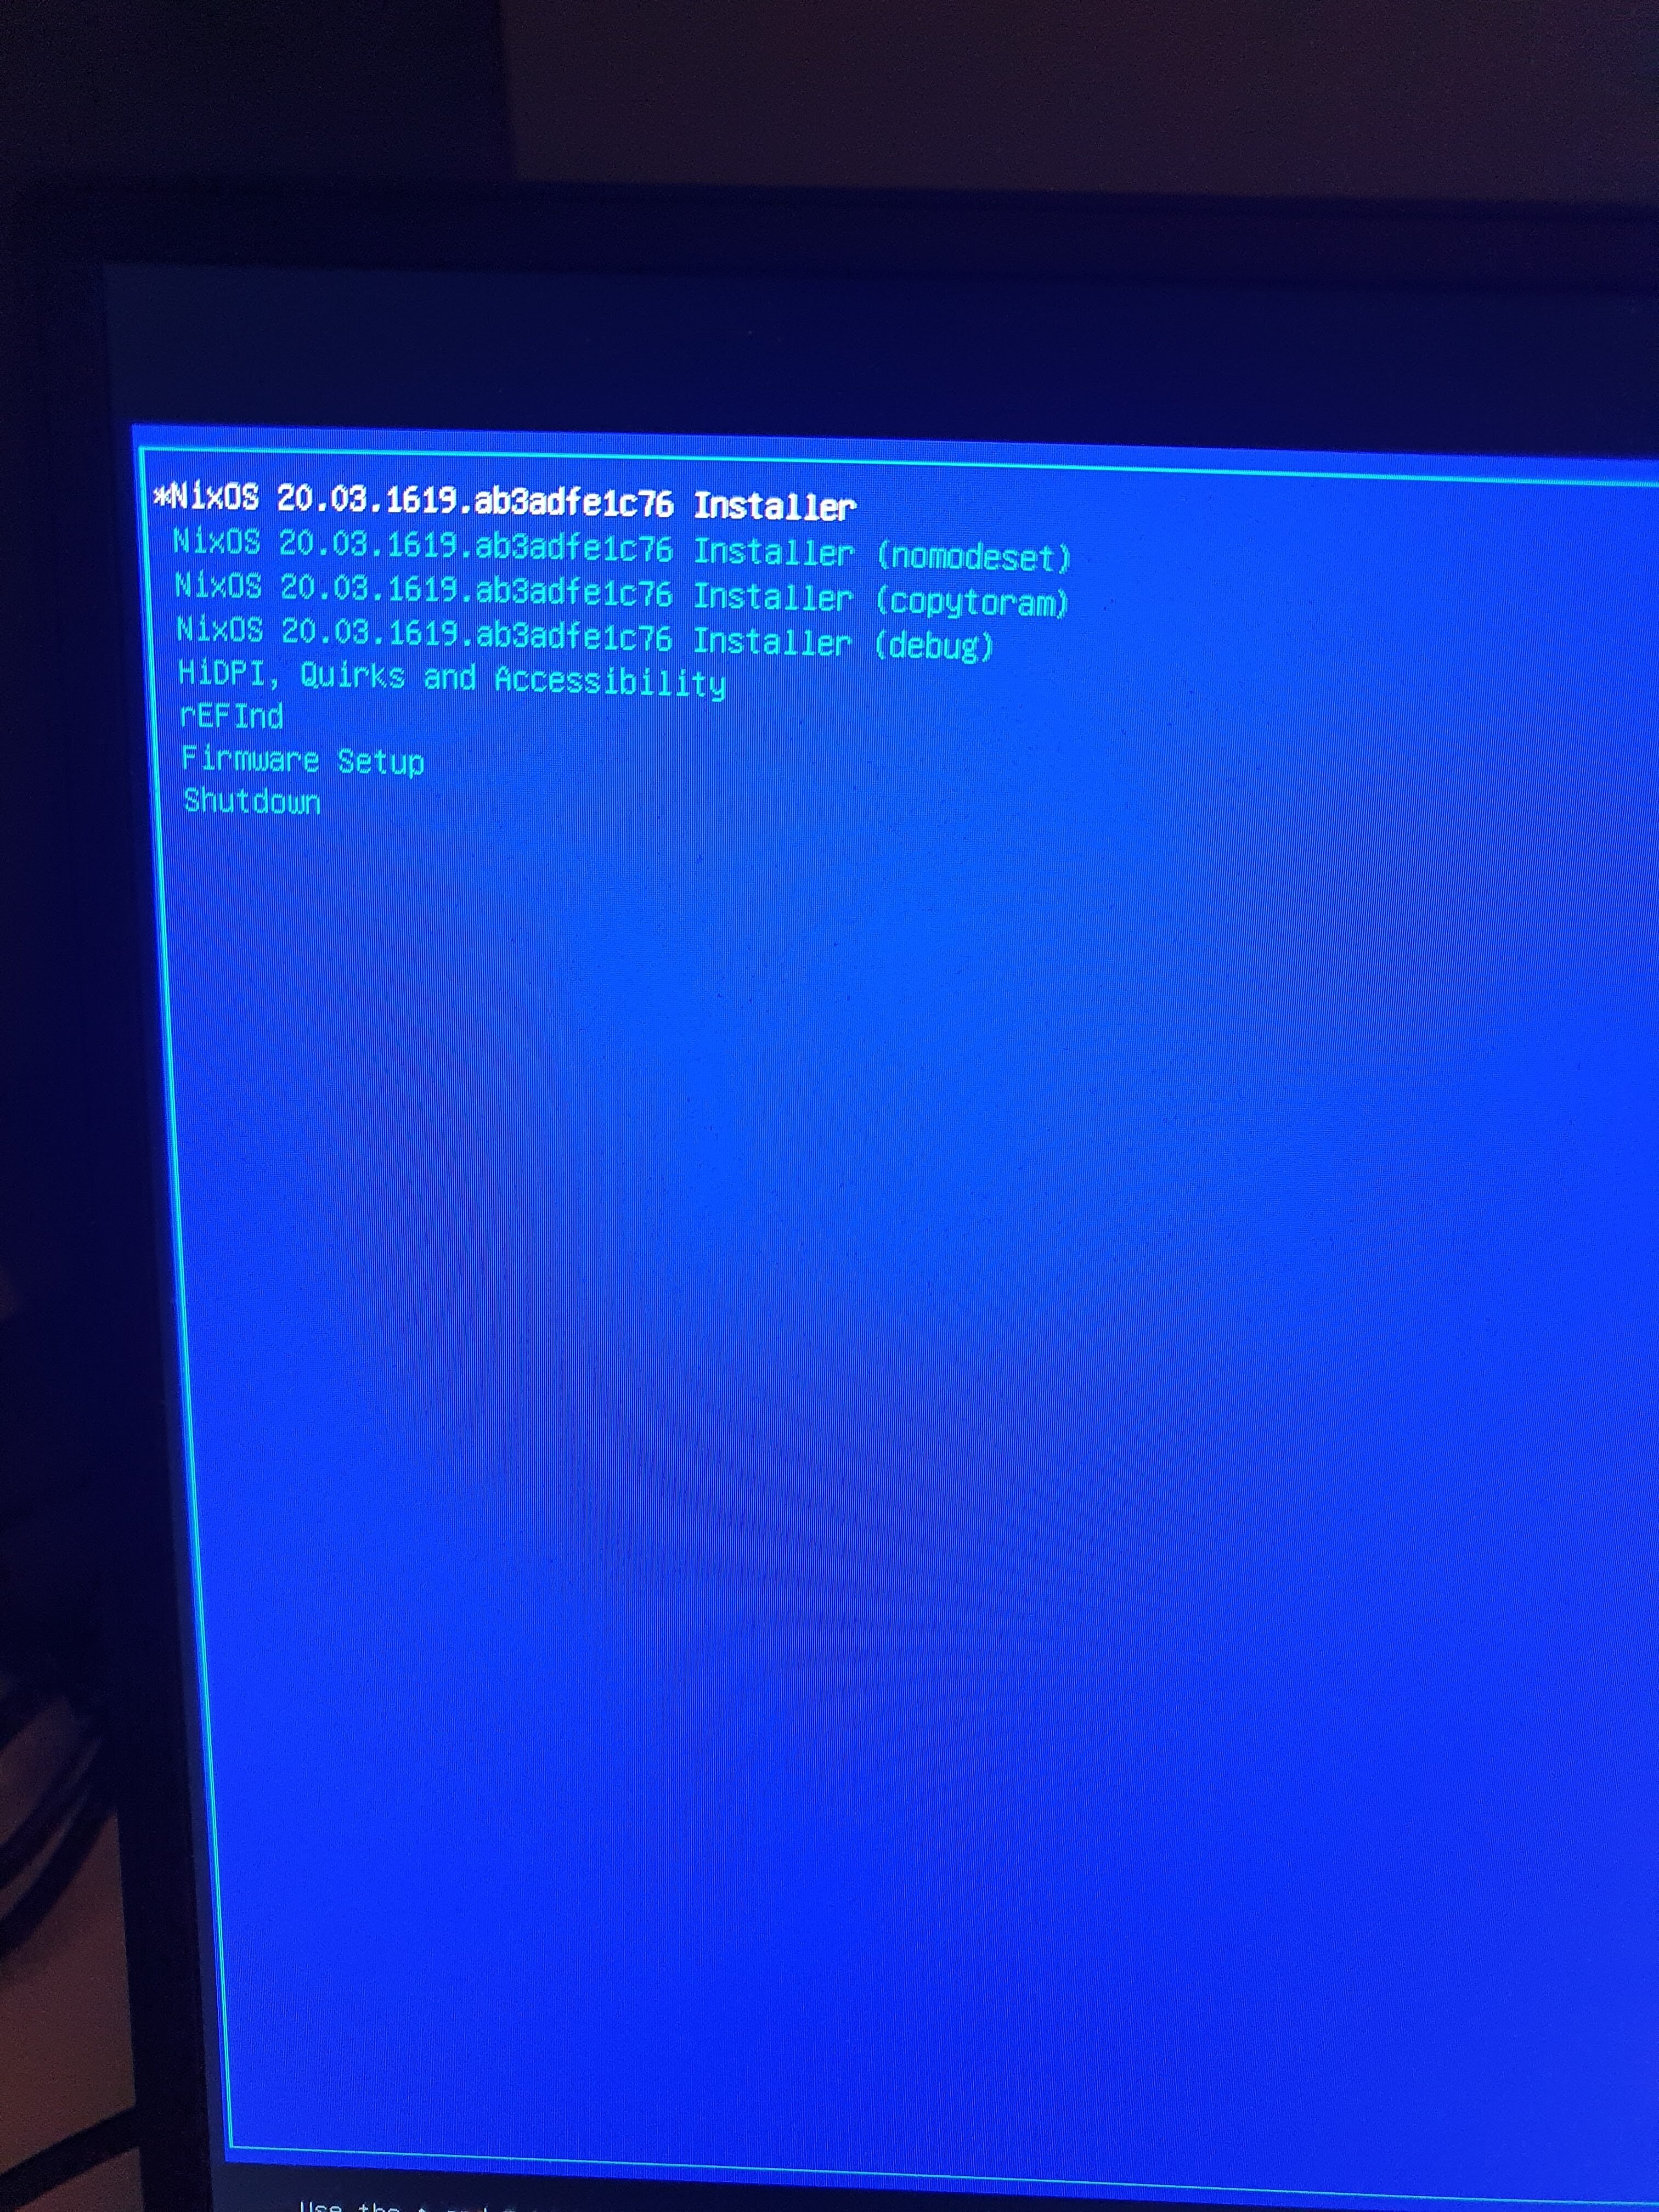
- Select the first option in the list (“NixOS 20.03.1619.ab3adfe1c76 Installer”).
To me, step 4 looked like this:
- The Plasma display manager should open. Go to WIFI settings and connect to your network.
- Open Konsole to get a terminal, and execute
sudo suto get superpowers. - Verify that we’re in UEFI by executing:
[ -d /sys/firmware/efi/efivars ] && echo "UEFI" || echo "fail". This should print “UEFI”. - Execute
lsblkto see which disks you have on the laptop. In my case, the disk I wanted to use was named/dev/nvme0n1. Before proceeding with the next steps, you should be 100% sure which disk you wish to use for NixOS, as what follows will format your system.
Create our file system
Now it’s time to use gdisk to setup our partitions.
- The first command to run is:
gdisk /dev/nvme0n1 - Press
oto create a new GPT partition table - Press
nto create a partitionpartition number: 1 first sector: (just hit enter) last sector: write “+512M” and hit enter hex code: EF00 - Press
nto create a partitionpartition number: 2 first sector: (just hit enter) last sector: (just hit enter) hex code: 8E00 - Press
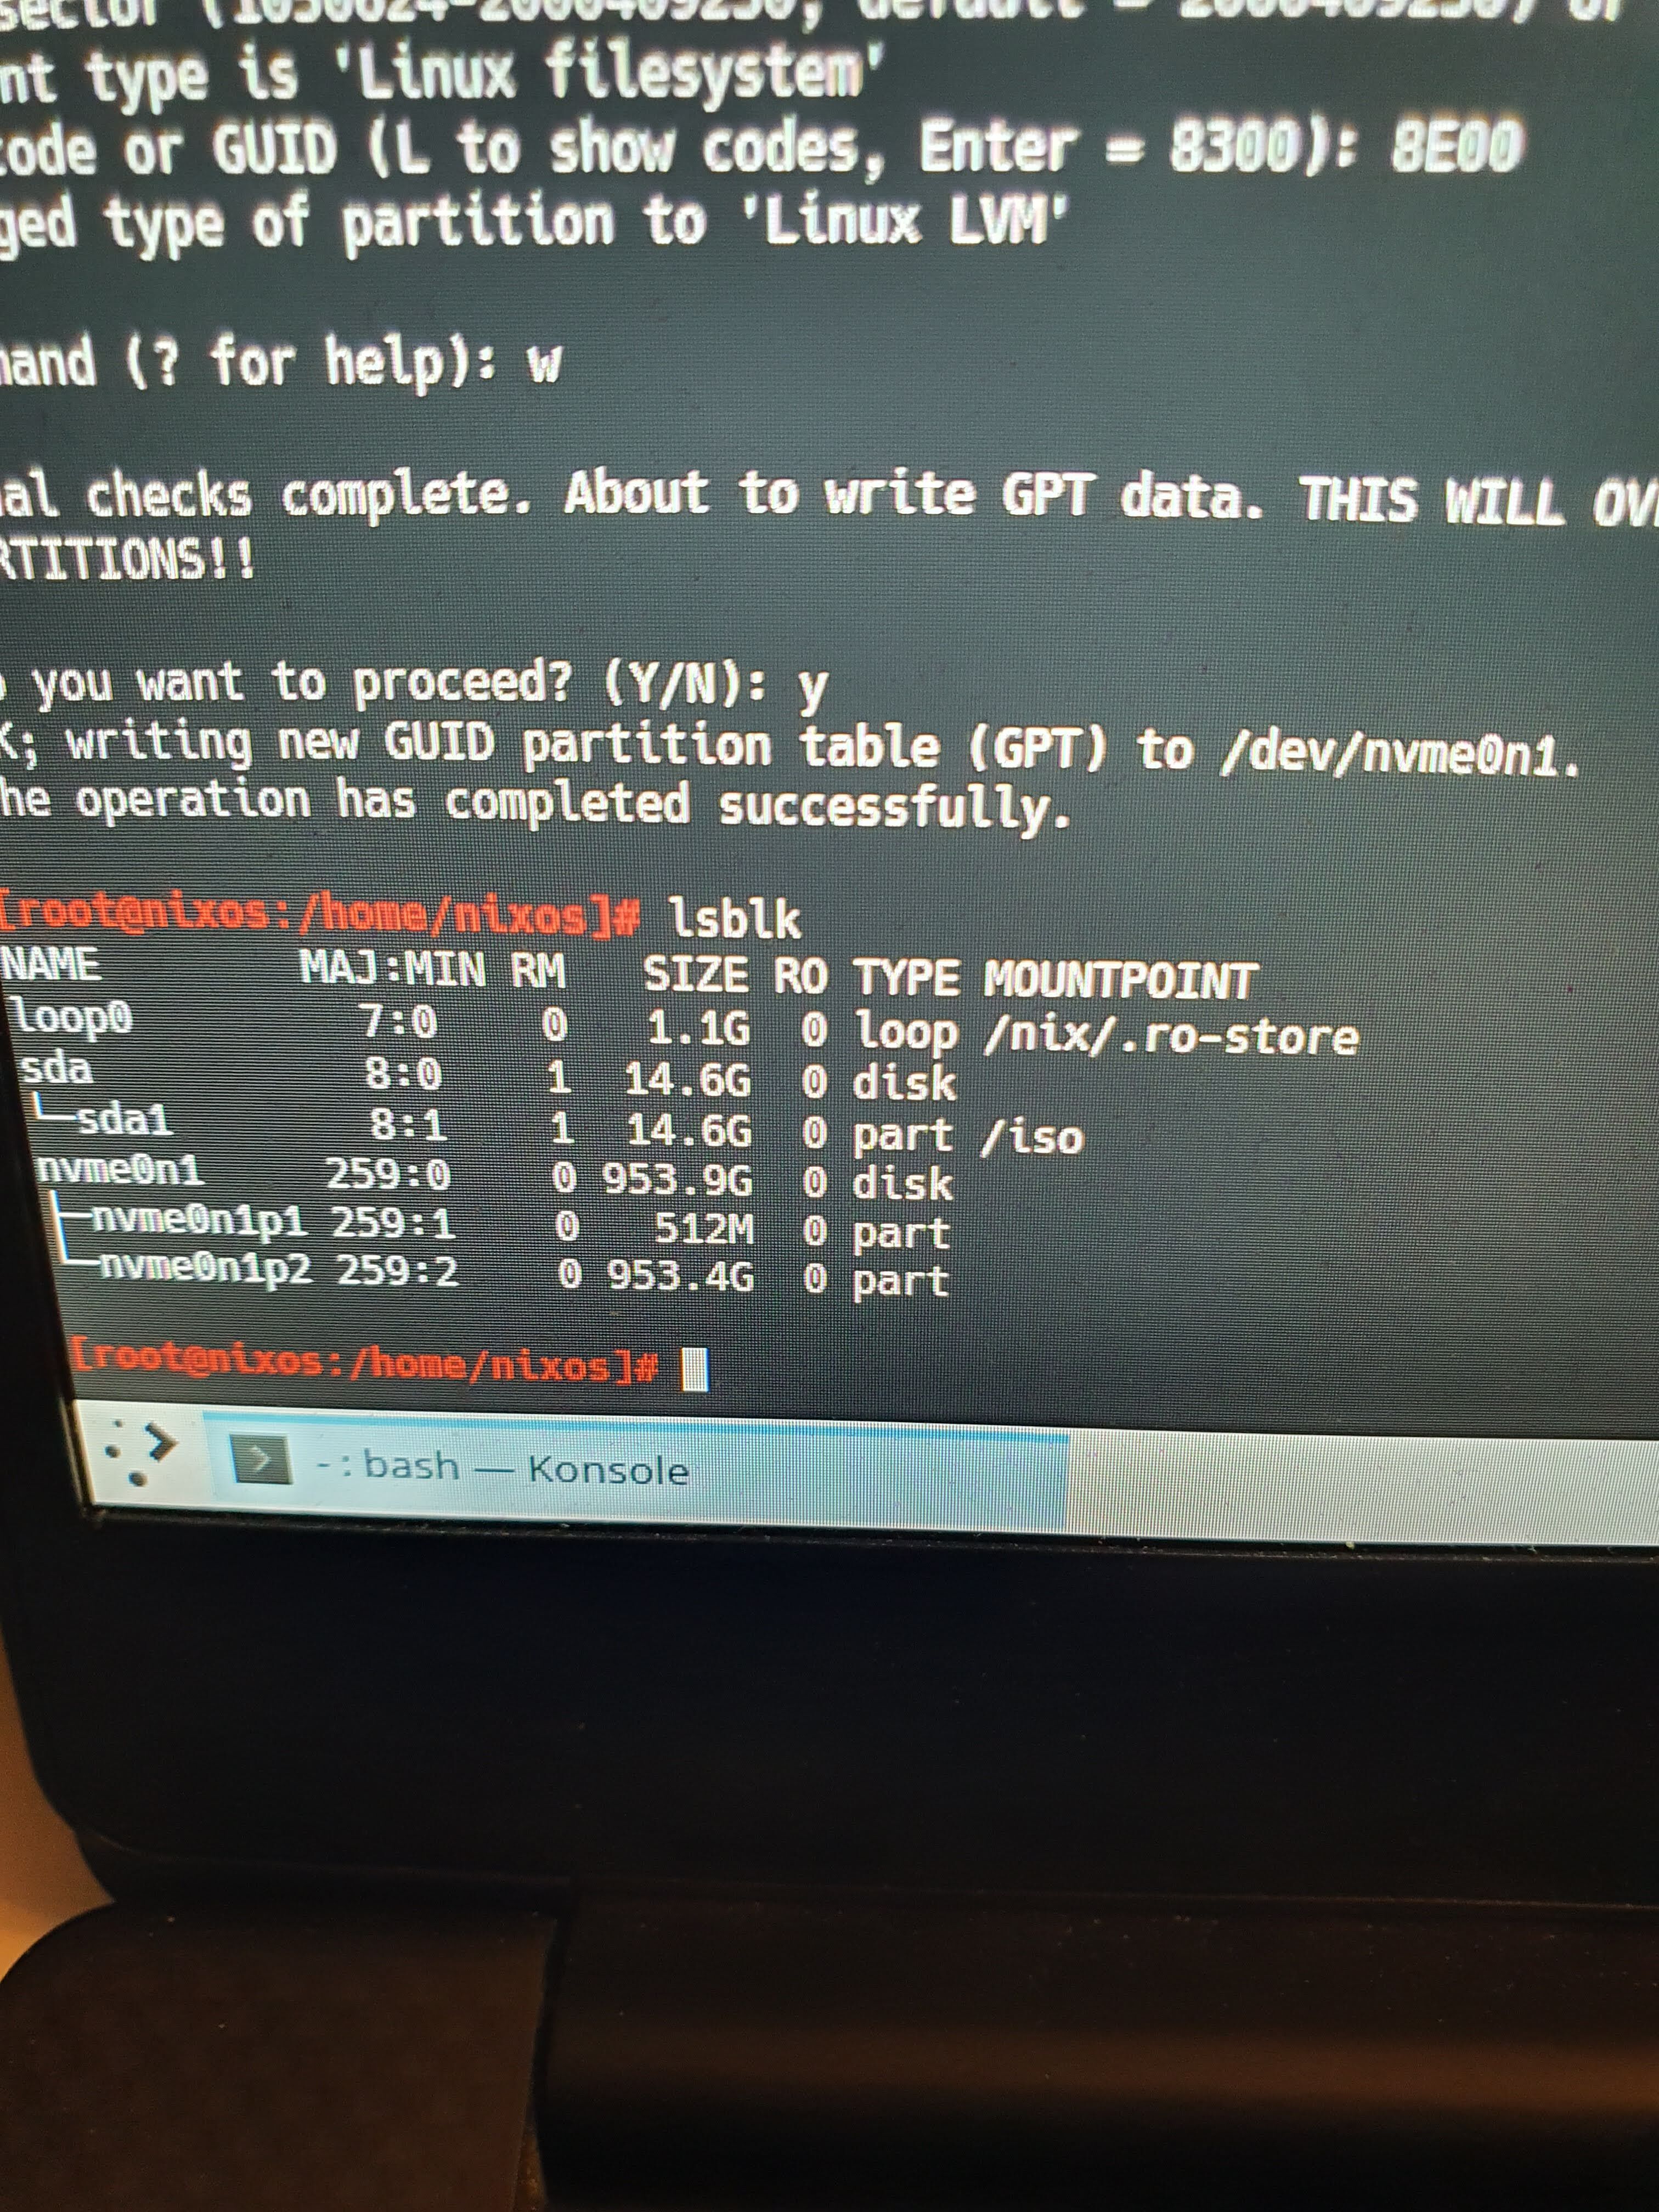
wto write the changes
After step 5, this is what lsblk told me:
Setup encryption
- Format the partition:
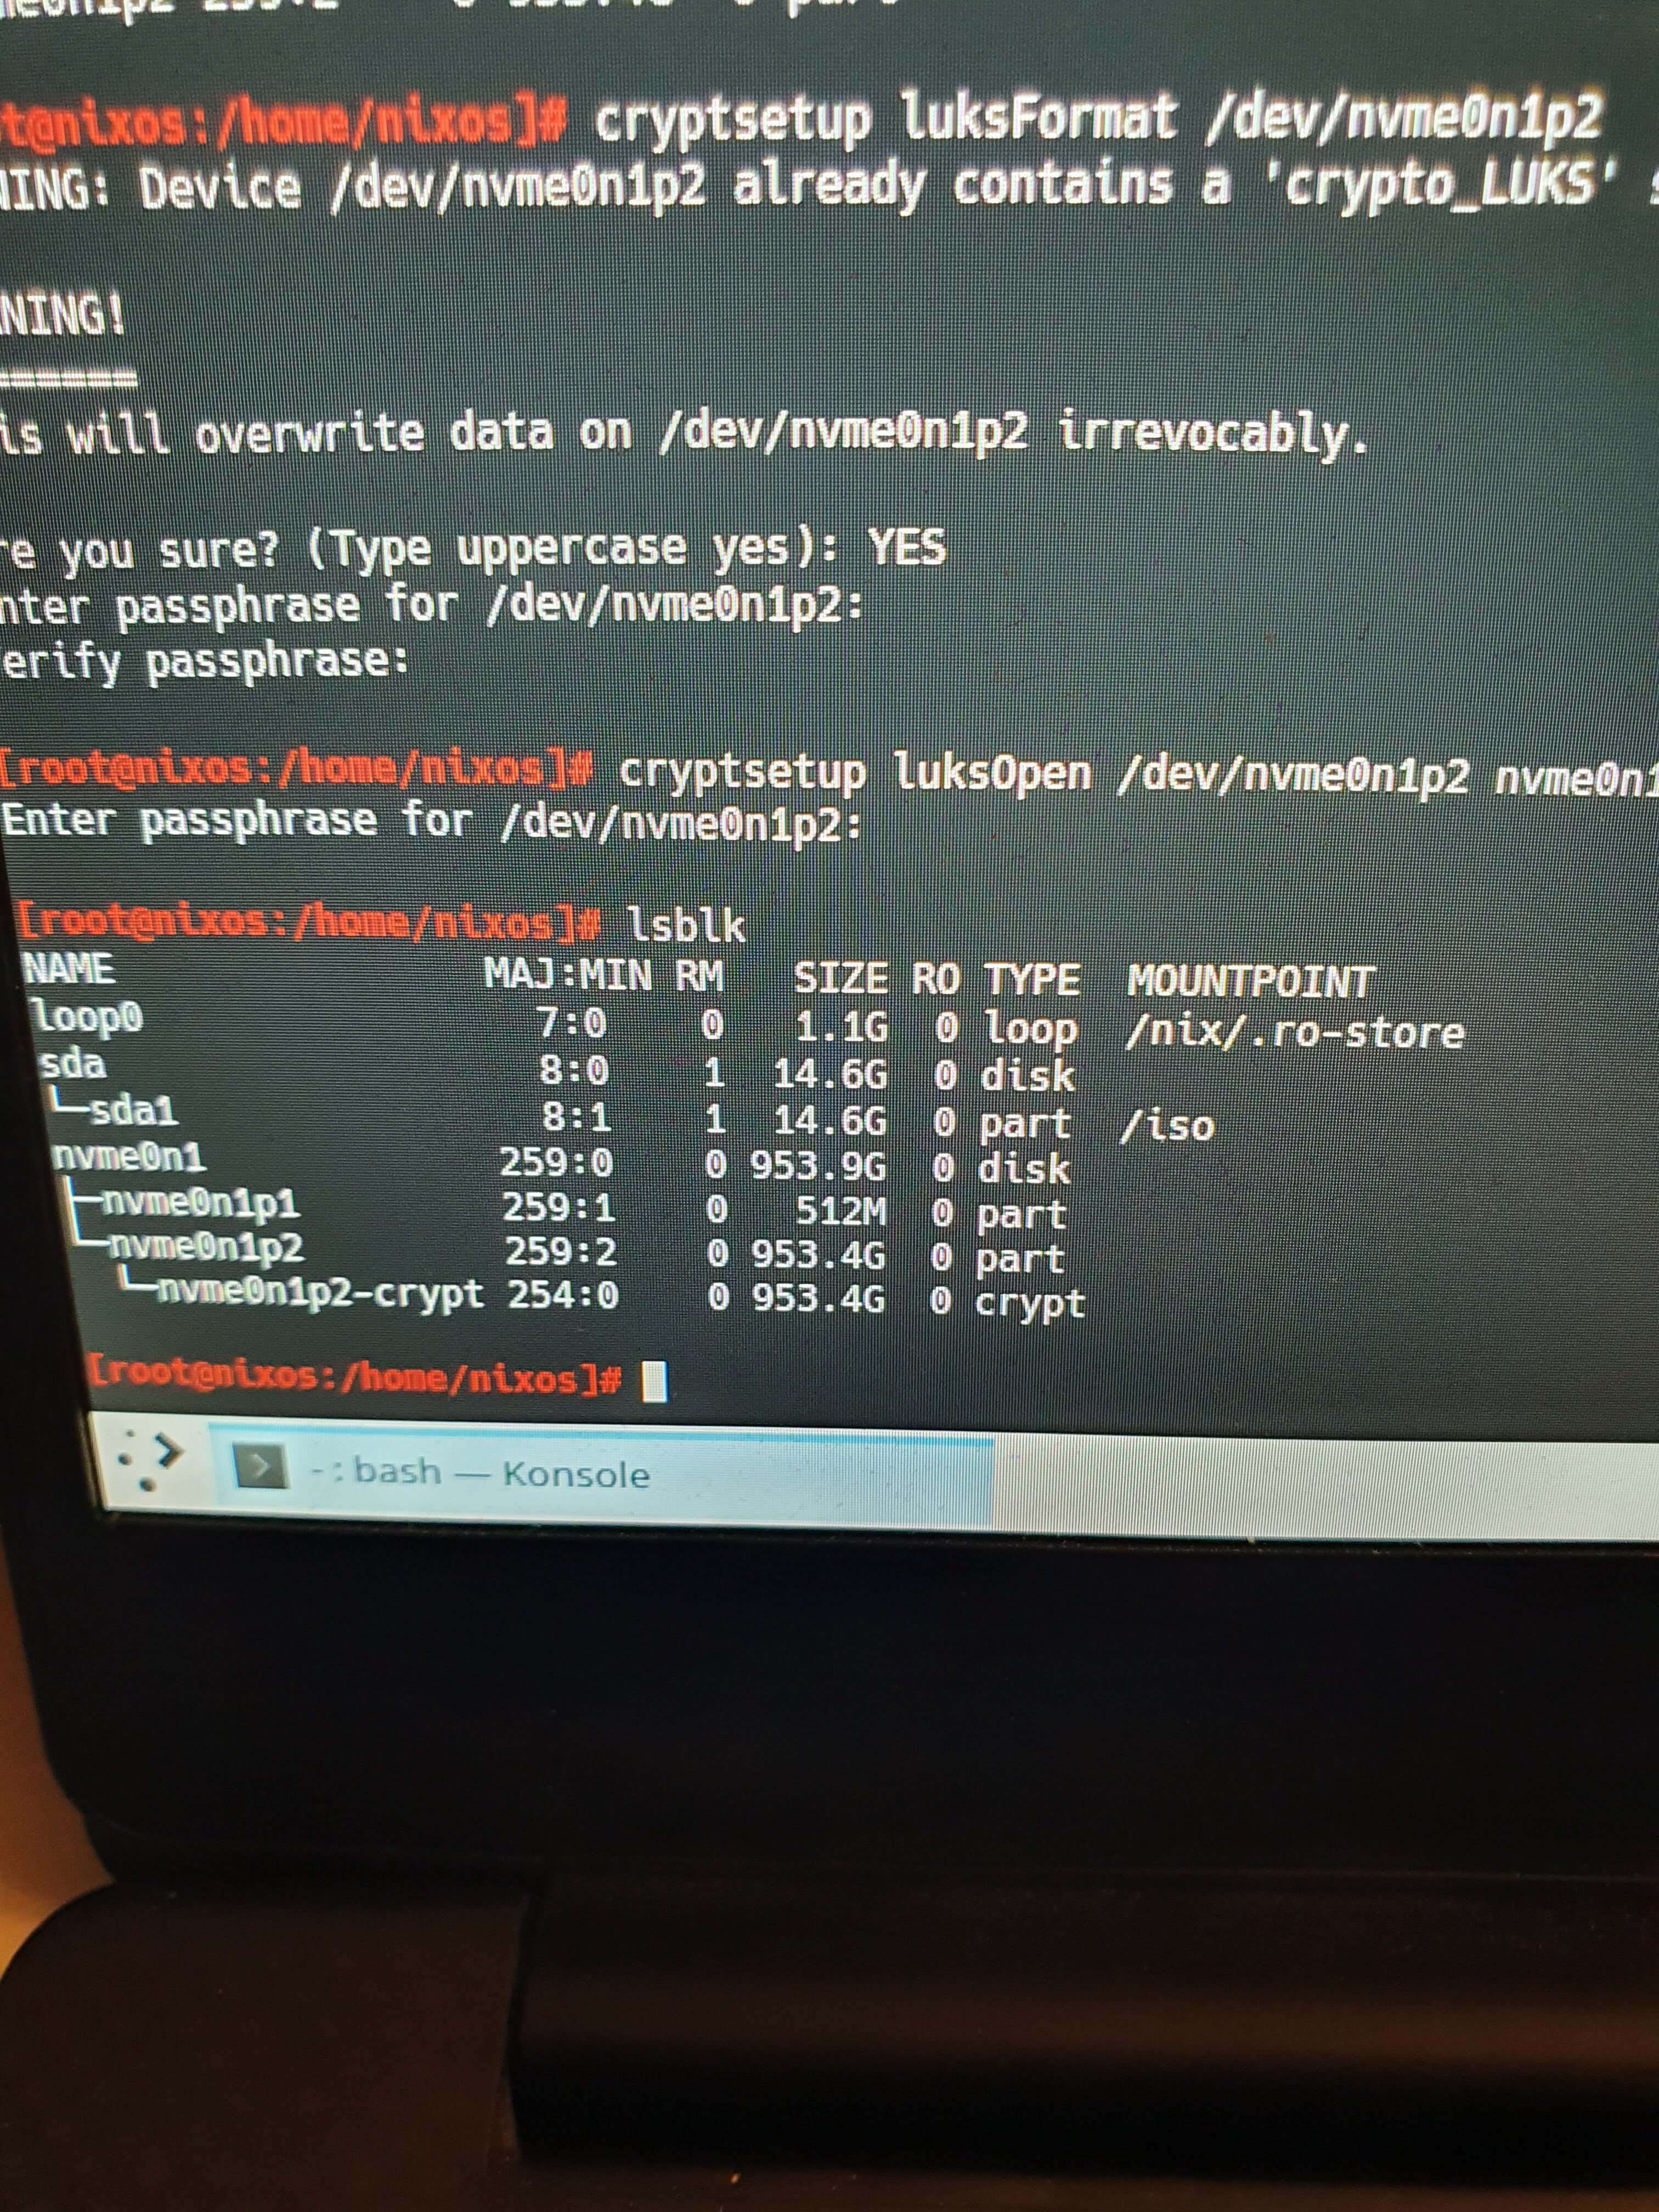
cryptsetup luksFormat /dev/nvme0n1p2and select a password. - Open the formatted partition:
cryptsetup luksOpen /dev/nvme0n1p2 nvme0n1p2-cryptand enter the password that you chose.
After step 2, this is what lsblk told me:
Setup LVM within the encrypted partition
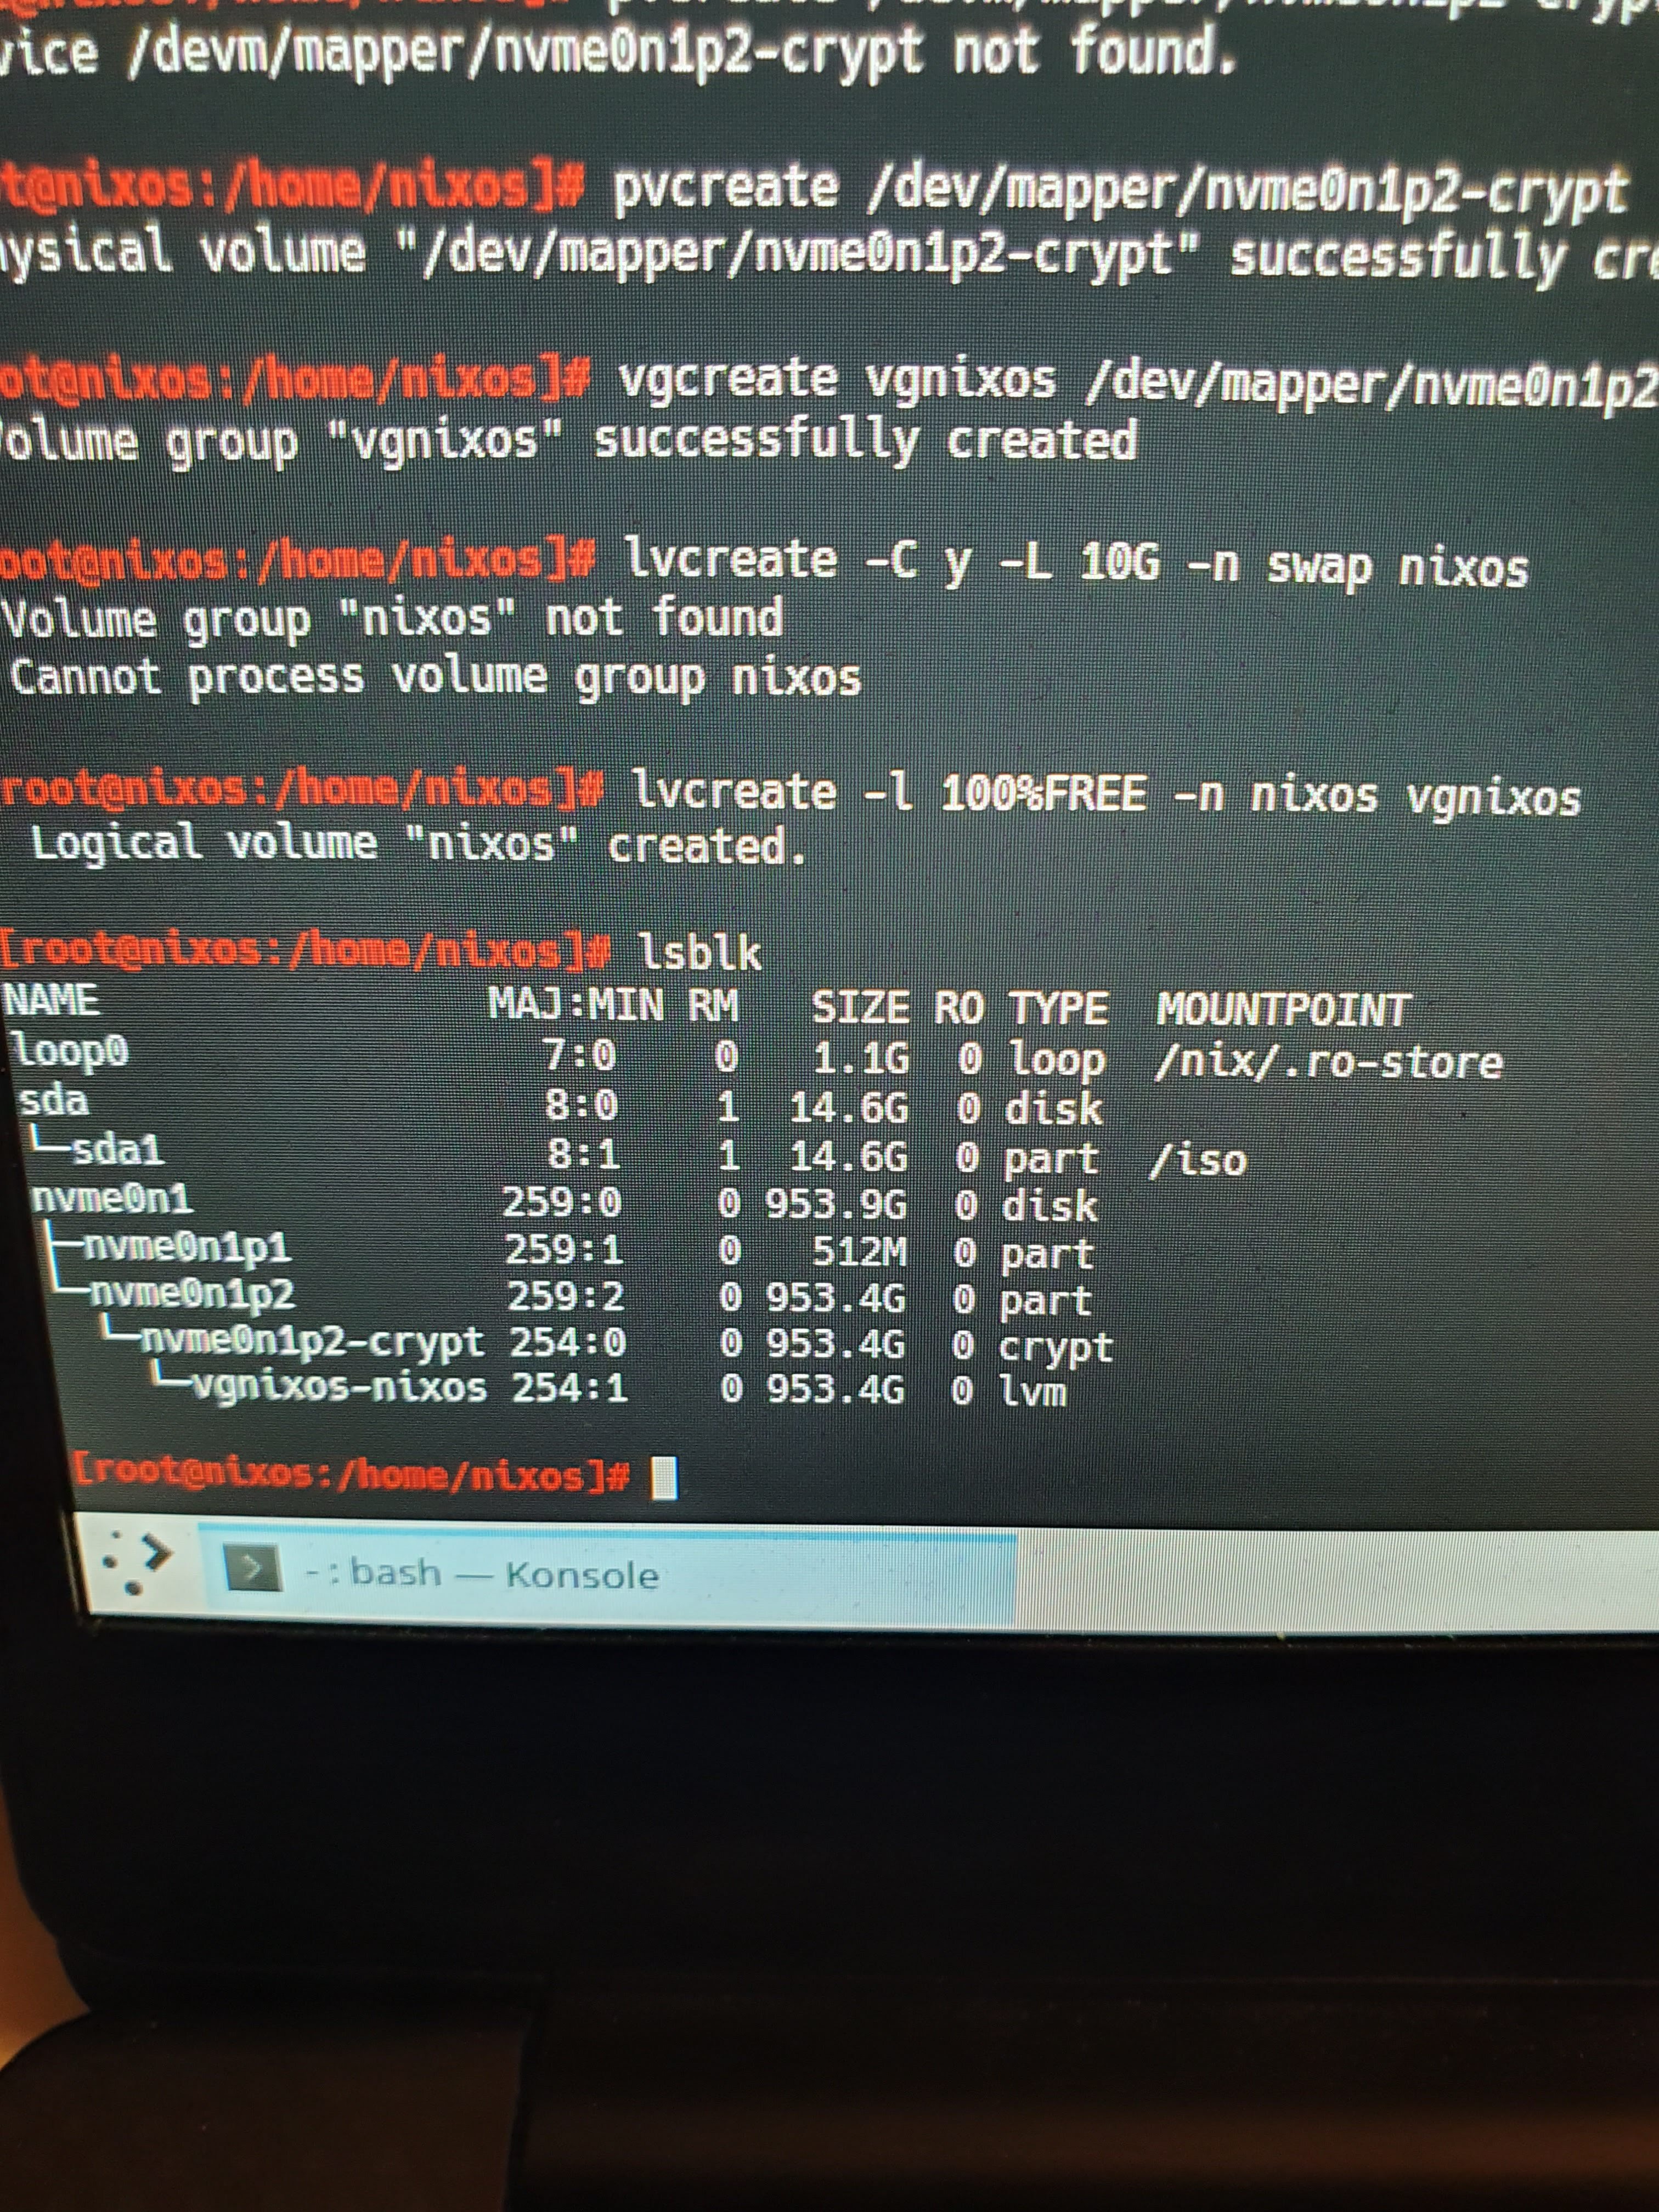
- Initiate a physical volume to be used by LVM:
pvcreate /dev/mapper/nvme0n1p2-crypt - Create a volume group:
vgcreate vgnixos /dev/mapper/nvme0n1p2-crypt - Create a swap volume:
lvcreate -C y -L 10G -n swap vgnixos - Create a volume for the rest of the space:
lvcreate -l 100%FREE -n nixos vgnixos
After step 4, this is what lsblk told me:
Actually create the file systems
mkfs.vfat -n BOOT /dev/nvme0n1p1to format the boot partition, giving it a label of “BOOT.”- Make vgnixos-nixos an ext4 filesystem:
mkfs.ext4 /dev/vgnixos/nixos - Make swap:
mkswap -L swap /dev/vgnixos/swap mount /dev/vgnixos/nixos /mntmkdir /mnt/bootmount /dev/nvme0n1p1 /mnt/bootswapon /dev/vgnixos/swap- Check the UUID of the LVM:
lsblk -f
This is what lsblk -f told me:
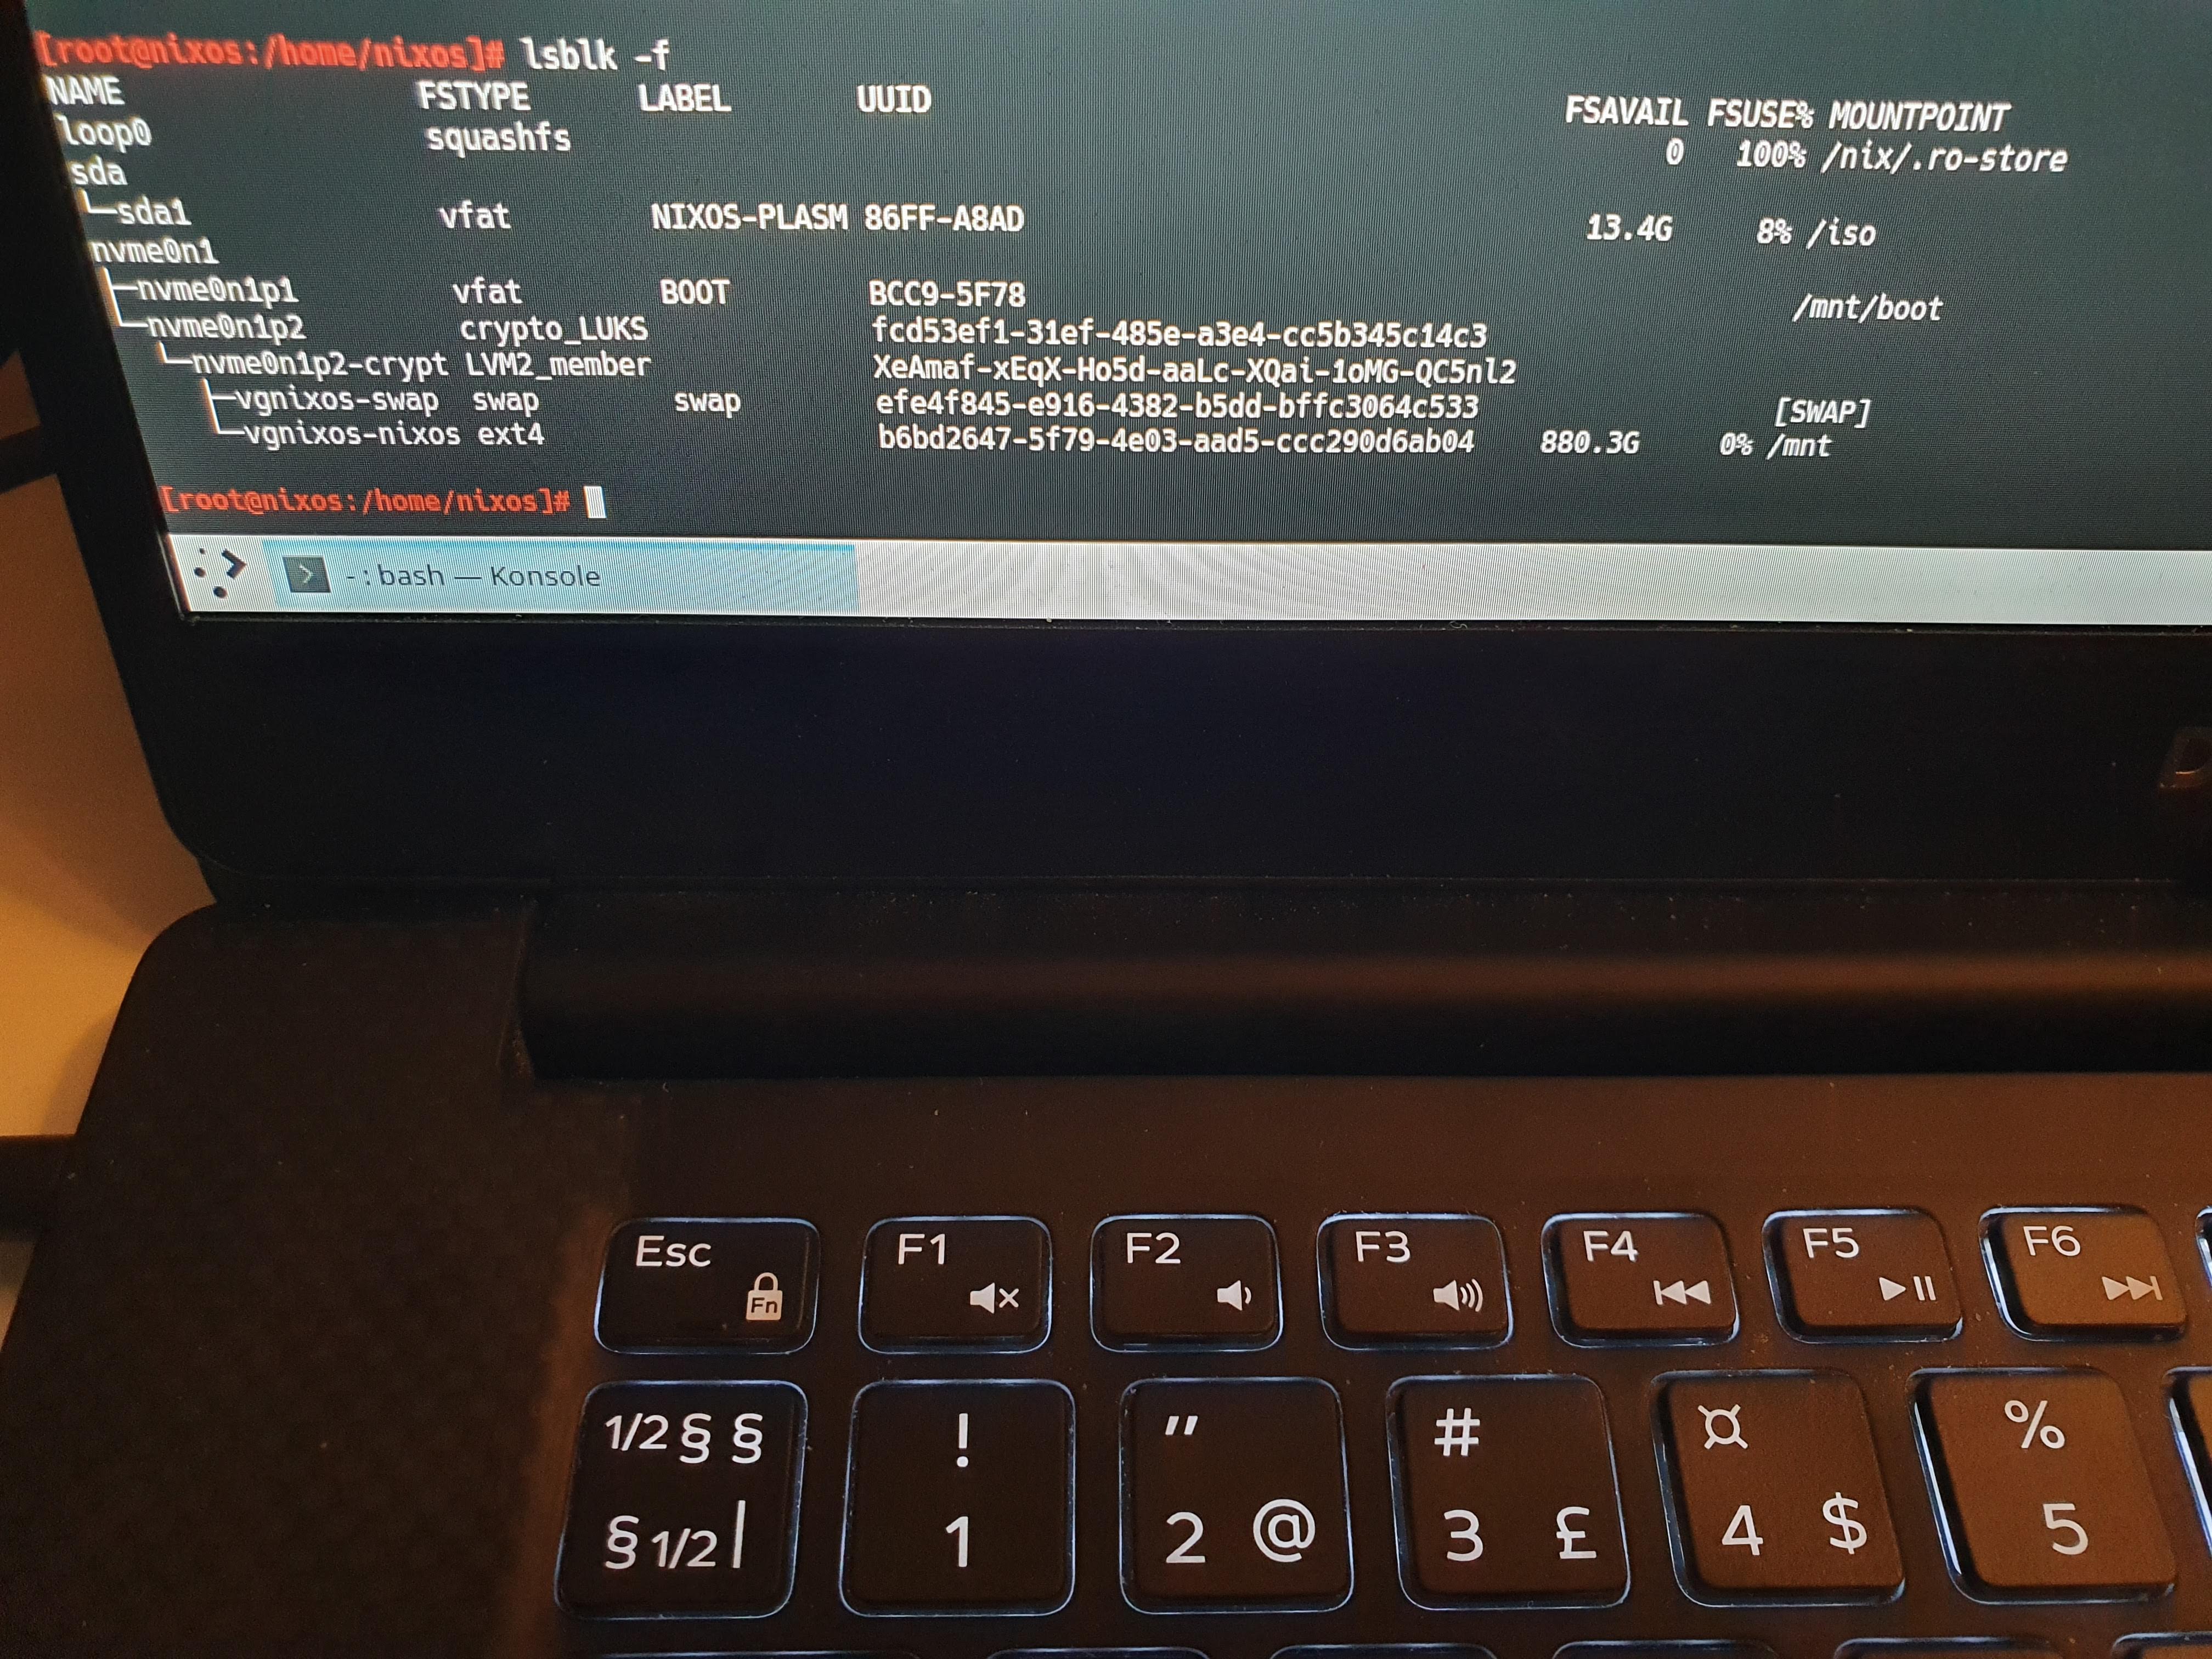
Here it’s important that you note the UUID of the “crypto_LUKS” disk. You will need to tell NixOS to use that disk by specifying the UUID later.
Create your NixOS configuration
- Generate nix config:
nixos-generate-config --root /mnt - Open the config: vi /mnt/etc/nixos/configuration.nix and update to match:
{
  imports =
    [ # Include the results of the hardware scan.
      ./hardware-configuration.nix
    ];

    # Use the systemd-boot EFI boot loader.
    boot.loader.systemd-boot.enable = true;
    boot.loader.efi.canTouchEfiCariables = true;
    boot.initrd.luks.devices = [
        {
        name="nixos";
        device="/dev/disk/by-uuid/fcd53ef1-31ef-485e-a3e4-cc5b345c14c3"; # This is where you enter the UUID of the crypto_LUKS disk.
        preLVM=true;
        }
    ];

    networking.useDHCP = false;
    networking.interfaces.enp0s3.useDHCP = true;

    i18n.defaultLocale = "en_US.UTF-8";
    console = {
      font = "Lat2-Terminus16";
      keyMap = "no";
    };

    time.timeZone = "Europe/Oslo";

    environment.systemPackages = with pkgs; [
      wget
      vim
      tmux
    ];

    # Enable the OpenSSH daemon.
    service.openssh.enable = true;

    # Enable sound.
    sound.enable = true;
    hardware.pulseaudio.enable = true;

    # Enable the X11 windowing system.
    services.xserver.enable = true;
    services.xserver.layout = "no";
    services.xserver.xkbOptions = "eurosign:e";

    # Enable touchpad support
    services.xserver.libinput.enable = true;

    # Enable the KDE Desktop Environment.
    services.xserver.displayManager.sddm.enable = true;
    services.xserver.desktopManager.plasma5.enable = true;

    # Define a user account. Don't forget to set a password with `passwd`.
    users.users.stian = {
      isNormalUser = true;
      extraGroups = [ "wheel" ];
    };

    system.stateVersion = "20.03";
}
- Finally, install NixOS by executing:
nixos-install. After running for a while, thenixos-installcommand should complete successfully. - Set a password for the user you created (“stian” in the example configuration above) by executing
passwd stianand entering a password. - Shut down the laptop, remove the USB drive, turn on the computer, and log in with your user.
Where to get help
- If you need help with any of these steps, the NixOS discourse forum is very helpful. I asked for help there myself when I struggled with the last steps of the NixOS installer.
- If you’re into IRC, I’ve heard that #nixos channel on Freednode is filled with friendly and helpful people.
Credits
I learned a lot from the following two blog posts: