Deploy Umami analytics with Kubernetes
Umami analytics is an open source, privacy-focused alternative to Google Analytics. Although are many such alternatives these days, what’s nice about Umami is that its only dependency is postgres.
We will use k3d (“k3s in docker”) to run a Kubernetes locally. From its website:
k3d is a lightweight wrapper to run k3s (Rancher Lab’s minimal Kubernetes distribution) in docker.
Start by creating a cluster:
k3d cluster create umami-cluster -p "80:80@loadbalancer"
This will create a single-node cluster, which works well for demonstrations such as ours. After the above command succeeds, take a look at the node that was created:
$ kubectl get nodes -o wide
NAME                         STATUS   ROLES                  AGE    VERSION        INTERNAL-IP   EXTERNAL-IP   OS-IMAGE   KERNEL-VERSION      CONTAINER-RUNTIME
k3d-umami-cluster-server-0   Ready    control-plane,master   102s   v1.22.7+k3s1   172.19.0.2    <none>        K3s dev    5.15.0-43-generic   containerd://1.5.9-k3s1
Let me also share some version information, in cause you’re following this blog post and are getting weird results:
$ kubectl version -o yaml
clientVersion:
  buildDate: "2022-03-16T15:58:47Z"
  compiler: gc
  gitCommit: c285e781331a3785a7f436042c65c5641ce8a9e9
  gitTreeState: clean
  gitVersion: v1.23.5
  goVersion: go1.17.8
  major: "1"
  minor: "23"
  platform: linux/amd64
serverVersion:
  buildDate: "2022-02-24T23:03:47Z"
  compiler: gc
  gitCommit: 8432d7f239676dfe8f748c0c2a3fabf8cf40a826
  gitTreeState: clean
  gitVersion: v1.22.7+k3s1
  goVersion: go1.16.10
  major: "1"
  minor: "22"
  platform: linux/amd64

$ k3d --version
k3d version v5.4.1
k3s version v1.22.7-k3s1 (default)
With that our of the way, let’s take a look at the default pods that are running in a new k3d (k3s) cluster:
$ kubectl get pods --all-namespaces
NAMESPACE     NAME                                      READY   STATUS      RESTARTS   AGE
kube-system   local-path-provisioner-84bb864455-2s2wx   1/1     Running     0          4m17s
kube-system   coredns-96cc4f57d-4n28j                   1/1     Running     0          4m17s
kube-system   helm-install-traefik-crd--1-g5k9j         0/1     Completed   0          4m18s
kube-system   helm-install-traefik--1-5k6zr             0/1     Completed   1          4m18s
kube-system   svclb-traefik-xskkc                       2/2     Running     0          3m48s
kube-system   metrics-server-ff9dbcb6c-wfz45            1/1     Running     0          4m17s
kube-system   traefik-56c4b88c4b-vzhmf                  1/1     Running     0          3m48s
Note that Traefik is running as the cluster ingress controller. We will take a closer look at traefik later when we try to expose our Umami deployment using a service and an ingress.
As noted in the introduction of this blog post, the only dependency that Umami has is Postgres. (Actually, Umami can also work with MySQL, but in this post we will use postgres.) So let’s start with that dependency. We will set up four things:
- A Kubernetes Deployment for Postgres.
- A Kubernetes ConfigMap which contains a sql script for the initial database setup.
- A Kubernetes Service for the deployment.
- A Kubernetes network policy which will dictate who should be allowed to talk to our postgres instance (ingress), and who our postgres instance should be able to talk to (egress).
Here is a simple postgres deployment, postgres-deployment.yaml:
apiVersion: apps/v1
kind: Deployment
metadata:
  name: ephemeral-postgres
  labels:
    app: ephemeral-postgres
spec:
  replicas: 1
  selector:
    matchLabels:
      app: ephemeral-postgres
  template:
    metadata:
      labels:
        app: ephemeral-postgres
    spec:
      containers:
        - name: ephemeral-postgres
          env:
            - name: POSTGRES_DB
              value: "defaultdb"
            - name: POSTGRES_USER
              value: "defaultuser"
            - name: POSTGRES_PASSWORD
              value: "helloisitmeyourelookingfor"
          image: postgres:14.3-alpine
          ports:
            - containerPort: 5432
          imagePullPolicy: Always
          resources:
            requests:
              cpu: 100m
              memory: 128Mi
              ephemeral-storage: 128Mi
            limits:
              cpu: 500m
              memory: 512Mi
              ephemeral-storage: 1Gi
          readinessProbe:
            exec:
              command:
                - psql
                - -d
                - defaultdb
                - -U
                - defaultuser
                - -c
                - SELECT 1
            initialDelaySeconds: 15
            timeoutSeconds: 2
          volumeMounts:
            - name: initialscript
              mountPath: /docker-entrypoint-initdb.d/
      volumes:
        - name: initialscript
          configMap:
            name: initialscript
            items:
              - key: "initial_setup.sql"
                path: "initial_setup.sql"
Note the name that I gave this deployment: ephemeral-postgres. This is a simple Kubernetes Deployment without persistent storage. This means that when this deployment fails or is taken down, the data stored within is lost. For a production use case, you would want some sort of persistent storage.
Here is the initialscript ConfigMap, postgres-configmap.yaml:
apiVersion: v1
kind: ConfigMap
metadata:
  name: initialscript
data:
  initial_setup.sql: |
    create database umamidb;
    create user umamiuser with encrypted password 'umamipsw';
    grant all privileges on database umamidb to umamiuser;
If you notice the volumeMounts in the above deployment, as well as the volumes further down, we’re taking the contents of the initial_setup.sql key in this configmap and we’re mounting that as a file within the path /docker-entrypoint-initdb.d/ of the Postgres container. The Postgres container will notice this, and run this script for us when it boots up. This is a nice way to complete the initial setup that we require for our use case. We could’ve only relied on the POSTGRES_DB, POSTGRES_USER, and POSTGRES_PASSWORD environment variables (we are indeed using those), but I like to avoid using the default root user.
Here is the service, which will make postgres available to other applications in our cluster, postgres-service.yaml:
apiVersion: v1
kind: Service
metadata:
  name: ephemeral-postgres
spec:
  type: ClusterIP
  ports:
    - name: ephemeral-postgres
      port: 5432
      targetPort: 5432
  selector:
    app: ephemeral-postgres
As we want to control who should be able to communicate with this Postgres instance, we will create a Kubernetes NetworkPolicy, postgres-network-policy.yaml:
apiVersion: networking.k8s.io/v1
kind: NetworkPolicy
metadata:
  name: ephemeral-postgres-network-policy
spec:
  podSelector:
    matchLabels:
      app: ephemeral-postgres
  policyTypes:
    - Ingress
    - Egress
  ingress:
    - ports:
        - protocol: TCP
          port: 5432
      from:
        - podSelector:
            matchLabels:
              app: umami
  egress: [ ]
This is a network policy that controls both ingress and egress. We are stating that an application (a Kubernetes Pod) with the label umami should be allowed to send traffic to Postgres. We are also stating that no traffic out (egress) should be allowed.
That’s it for our database. Let’s move on to Umami itself. We will create four things:
- A Kubernetes Deployment for Umami
- A Kubernetes Service for the deployment.
- A Kubernetes NetworkPolicy which will dictate who should be allowed to talk to our Umami instance (ingress), and who our Umami instance should be able to talk to (egress).
- A Kubernetes Ingress, which will expose our Umami instance to the outside world (thanks to Traefik, as we will see).
Here is a simple umami deployment, umami-deployment.yaml:
kind: Deployment
apiVersion: apps/v1
metadata:
  name: umami
  labels:
    app: umami
spec:
  replicas: 1
  selector:
    matchLabels:
      app: umami
  template:
    metadata:
      labels:
        app: umami
    spec:
      containers:
        - name: umami
          image: docker.umami.is/umami-software/umami:postgresql-v1.36.1
          ports:
            - name: umami
              containerPort: 3000
          env:
            - name: TRACKER_SCRIPT_NAME
              value: badabadabom # Just need to be something other than "umami", so that ad blockers don't block it
            - name: DISABLE_TELEMETRY
              value: "1"
            - name: DISABLE_UPDATES
              value: "1"
            - name: DATABASE_URL
              value: "postgresql://umamiuser:umamipsw@ephemeral-postgres.default.svc.cluster.local:5432/umamidb"
            - name: HASH_SALT
              value: "replace-me-with-a-random-string"
          readinessProbe:
            failureThreshold: 1
            httpGet:
              path: /
              port: 3000
              scheme: HTTP
            initialDelaySeconds: 10
            periodSeconds: 10
            successThreshold: 1
            timeoutSeconds: 2
Here is the service, which will make Umami available for the Ingress that we’ll create next, umami-service.yaml:
apiVersion: v1
kind: Service
metadata:
  name: umami
spec:
  type: ClusterIP
  ports:
    - protocol: TCP
      name: umami
      port: 3000
      targetPort: 3000
  selector:
    app: umami
And here is the network policy, which will allow ingress (traffic in to the application), but not egress (traffic out), umami-network-policy.yaml:
kind: NetworkPolicy
apiVersion: networking.k8s.io/v1
metadata:
  name: umami-allow-all-ingress-and-limited-egress
spec:
  podSelector:
    matchLabels:
      app: umami
  policyTypes:
    - Ingress
    - Egress
  ingress:
    - { } # Allow all ingress
  egress:
    # Allow egress to postgres:
    - ports:
        - protocol: TCP
          port: 5432
      to:
        - podSelector:
            matchLabels:
              app: ephemeral-postgres
    # Allow UDP so that the application is able to resolve the address `ephemeral-postgres`:
    - ports:
        - protocol: TCP
          port: 53
        - protocol: UDP
          port: 53
Here is the Ingress, which will make Traefik route traffic to Umami, umami-ingress.yaml:
apiVersion: networking.k8s.io/v1
kind: Ingress
metadata:
  name: umami-ingress
spec:
  rules:
    - host: umami.myapp.local
      http:
        paths:
          - path: /
            pathType: Prefix
            backend:
              service:
                name: umami
                port:
                  number: 3000
Note the host set there: <umami.myapp.local>. If you add this entry to /etc/hosts:
127.0.0.1 umami.myapp.local
Then going to <umami.myapp.local> should, after we deploy all of the above, lead us to the Umami deployment! Let’s start with creating the postgres resources:
$ kubectl create -f postgres-configmap.yaml
configmap/initialscript created

$ kubectl create -f postgres-deployment.yaml
deployment.apps/ephemeral-postgres created

$ kubectl create -f postgres-network-policy.yaml
networkpolicy.networking.k8s.io/ephemeral-postgres-network-policy created

$ kubectl create -f postgres-service.yaml
service/ephemeral-postgres created
And let’s see postgres ready and working (it may take a little while for it to get ready):
$ kubectl wait pods -l app=ephemeral-postgres --for condition=Ready
pod/ephemeral-postgres-5d9dd95bb7-zbt44 condition met
Now we can create the resources for Umami:
$ kubectl create -f umami-deployment.yaml
deployment.apps/umami created

$ kubectl create -f umami-service.yaml
service/umami created

$ kubectl create -f umami-network-policy.yaml
networkpolicy.networking.k8s.io/umami-allow-all-ingress-and-limited-egress created

$ kubectl create -f umami-ingress.yaml
ingress.networking.k8s.io/umami-ingress created
And similarly let’s see umami ready and working (it may take a little while for it to get ready):
$ kubectl wait pods -l app=umami --for condition=Ready
pod/umami-556c798bcf-j4npv condition met
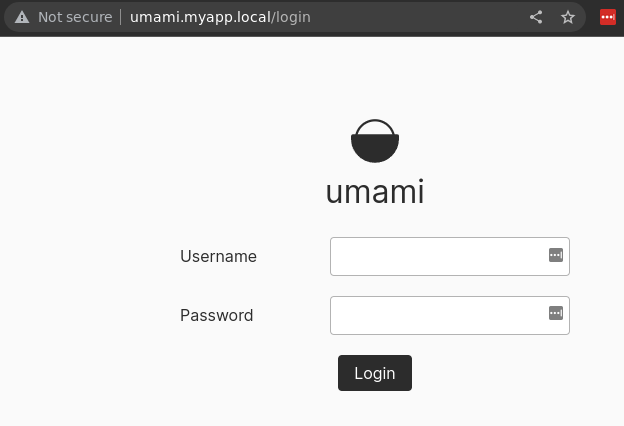
And if you go to http://umami.myapp.local in the browser, you should see this:
If this doesn’t work for you, and you use Chrome, then you may need to do a couple of things:
- Go to
chrome://settings/securityand uncheck use secure dns - Go to
chrome://net-internals/#dnsand click clear host cache
And then it should work. For fun, we’ll take a look at the Traefik ingress controller as well. We can open a port to that like this:
$ kubectl port-forward -n kube-system "$(kubectl get pods -n kube-system| grep '^traefik-' | awk '{print $1}')" 9000:9000
Forwarding from 127.0.0.1:9000 -> 9000
Forwarding from [::1]:9000 -> 9000
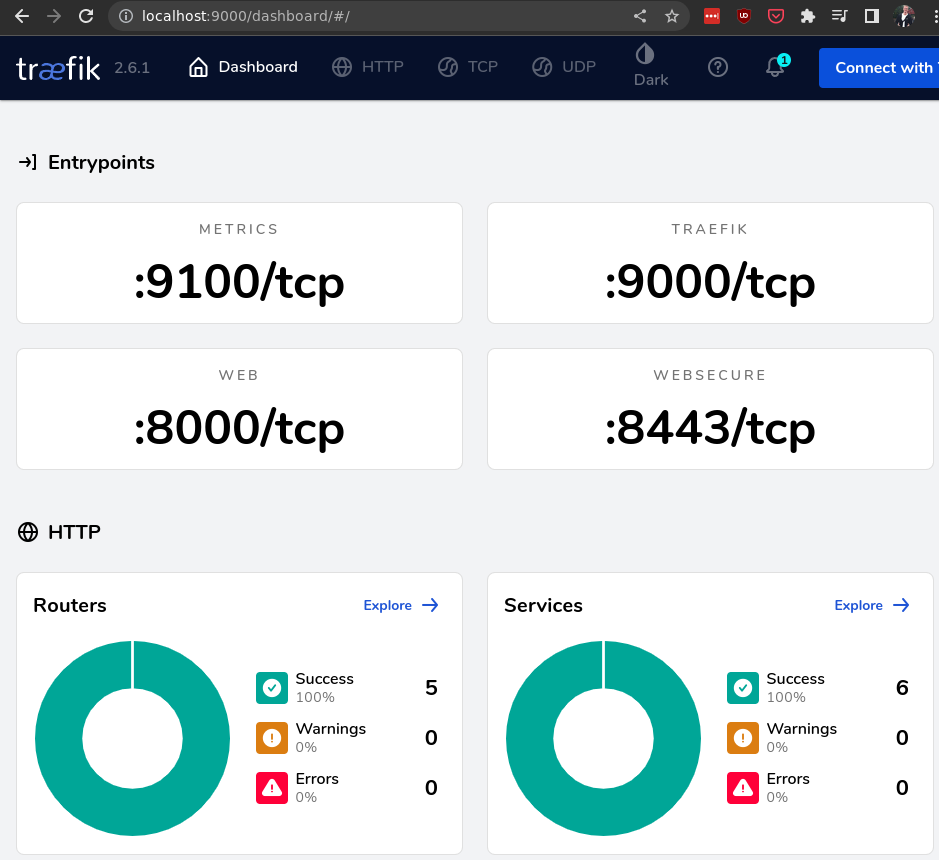
If you then go to http://localhost:9000/dashboard/ in your browser, then you should see this:
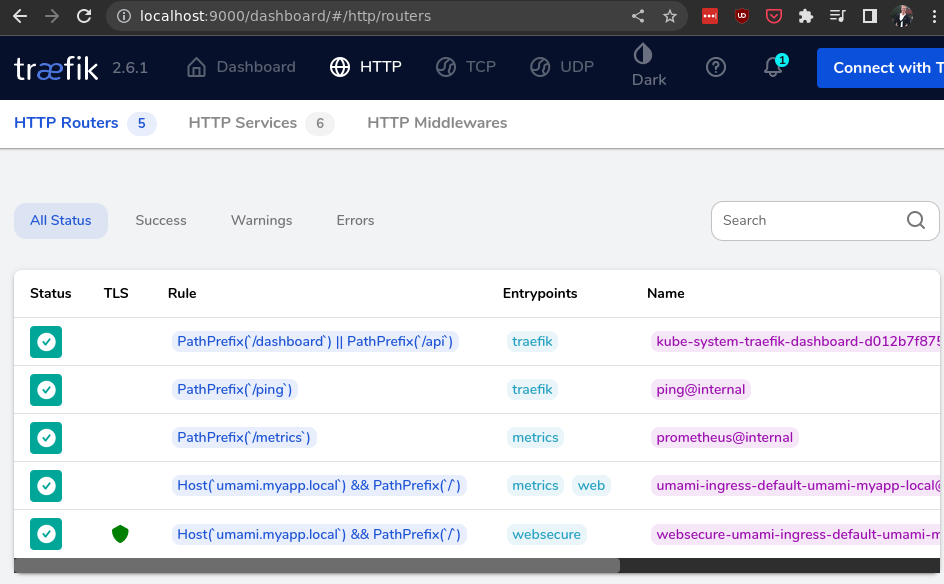
If you click “Explore” on the routers there, then you’ll see that the traefik ingress controller has picked up our ingress resource:
To summarize, we’ve
- created a local Kubernetes cluster using k3d
- deployed postgres into this cluster
- deployed umami into this cluster
- seen how traefik picks up ingress resources and routes traffic from outside the cluster into services inside the cluster
As an additional bonus, we’ll do two more things:
- Note that Umami has a default admin user with username
Adminand passwordumami. We can utilize Kubernetes init containers to set another password for us. Here is something you can add to the Umami deployment to change the admin password tosupersecretpassword:
      initContainers:
        - name: init-run-migrations
          image: docker.umami.is/umami-software/umami:postgresql-v1.36.1
          command: [ 'sh', '-c', "yarn check-db" ]
          env:
            - name: DATABASE_URL
              value: "postgresql://umamiuser:umamipsw@ephemeral-postgres.default.svc.cluster.local:5432/umamidb"
        - name: init-change-admin-password
          image: postgres:14.3-alpine
          command: [ 'psql', '-Atx', 'postgresql://umamiuser:umamipsw@ephemeral-postgres.default.svc.cluster.local:5432/umamidb', '-c', "update account set password='$2a$10$/h1OtW7bawe.HwltNBxRmO0RPs7p./noOc/JxG0xCmCwijmfq7oVK';" ] # supersecretpassword
- To create an Umami website, you have to manually open the admin interface and create a website from there. In this infrastructure-as-code world however, we wish to do this programmatically. We can do that using an init container, like this:
     - name: init-create-website
       image: postgres:14.3-alpine
       command: [ 'psql', '-Atx', 'postgresql://umamiuser:umamipsw@ephemeral-postgres.default.svc.cluster.local:5432/umamidb', '-c', "insert into website (website_id, website_uuid, user_id, name, domain, share_id) values (1, '40e6215d-b5c6-4896-987c-f30f3678f608', 1, 'client', 'my-super-website.example.com', 'what') ON CONFLICT DO NOTHING;" ]
That’s it! If you learned something from this, please let me know. That’ll inspire me to write more :)